Cauliflower Pizza


I have heard so much about cauliflower pizza but was always a little skeptical. The typical gist when it first became an internet sensation was that the crust wasn’t crunchy enough. So I waited … and I finally found a recipe that I decided I’d give a try.  I changed up the recipe just a tad because I used what I had on hand and seasoned it a bit more with what I liked.
For the most part I followed the general recipeexcept I used reduced fat parmesan and did my own blend of spices within the pizza crust.
The most tedious part of this pizza was cutting up the cauliflower and pulverizing it in the food processor. Then again, I have a little peanut of a food processor so I had to do small little handfuls at a time. But once that was done, it was easy-peasy. Cooking the cauliflower in the microwave and straining the water out of it was simple. Although I will say, trying to get little rice size bits of cauliflower off a white kitchen towel was an interesting feat.  The greatest part?
The ENTIRE crust alone was only 8 points plus values! If the serving is cut down into 2, half the crust is 4 points plus values. Quite a drop in stats considering the calories/Weight Watchers points plus associated with pizza crust!  Here’s how I doctored my crust up a bit:
Ingredients:
          ¼ cup reduced fat parmesan cheese
          ¼ cup shredded whole milk mozzarella cheese
          1 egg, beaten
          1 small head uncooked cauliflower
          ½ tsp salt
          ½ tsp black pepper
          1 ½ tsp garlic powder
          1 tsp oregano
          ½ tsp crushed red pepper flakes
When the crust was done I decided to top the pizza with ½ cup Barilla traditional spaghetti sauce (because it’s what I had on hand), 1/3 cup Kraft fat free mozzarella, 6 slices of Hormel turkey pepperoni, a few slices onions and peppers and some banana pepper rings. I returned the pizza to the oven just for the cheese to melt and when done, I cut it up to serve.
After all the toppings my entire pizza was 11 points plus values! Quite a steal considering 1 slice of your average take-out pizza is 7 points plus values.
Final verdict? The pizza was quite good … the crust wasn’t as crispy and crunchy as regular pizza crust and you could definitely tell it was cauliflower but it wasn’t bad.  Would I make it again? Sure, thing.

Meatball & Pepperoni Pita Pizza

This is a special little treat I had made for myself for nearly half a week. I was in the mood for pizza, but since I was trying to be “good” and not order out pizza I decided to make some healthier pita bread pizzas for myself.  They turned out to be delicious, extremely low in points and nailed the pizza want on the head.
I used 2 Joseph’s Flax Oat Bran & Whole Wheat Pita Breads and between the two bases topped it with ¼ cup canned tomato sauce that I doctored up with a bit of spices (salt, pepper, red pepper flakes, garlic, Italian seasoning). I then divided out 1/3 cup of Kraft Fat Free Shredded Mozzarella and topped each pizza. I had some thick cut turkey pepperoni in the fridge so I took 2 slices (0pp) and cut it into quarters and topped each pizza. I then took 1 Trader Joe’s Turkey Meatball and cut it up into pieces and topped my pizzas with it. Since I enjoy my pizza with veggies I cut up some red onion and sprinkled it over the top.
I popped the pizzas in a 350 degree oven for roughly 8-10 minutes and took them out when the bread was crispy. They were perfect, tasty and delicious. Plus they were a guilt-free 5 points plus values! 3 for the pita, 1 for the meatball and 1 for the cheese.
Winner winner, pizza dinner!

Chocolate Peanut Butter Spice Cake


Spice cake is one of my favorite desserts to whip up when I’m in the mood for something tasty, mildly sweet and just all around delicious. I knew I had all the ingredients I needed to whip something together, so I made my way into the kitchen and let the creativity flow.
The cake itself always comes out super moist and delicious. I add a pinch of baking soda to my cake mixes that don’t use water/oil/eggs because it helps make the dessert just slightly fluffier. The chocolate peanut butter chips definitely added a peanut buttery chocolaty goodness to the cake that made it decadent. I shared it with family and friends who came by and everyone was equally pleased with it. The next day, after the cake was fully cooled I found it was perfect to warm it in the microwave for a few seconds and top it with a smidgen of butter. Perfect combination and it made it a great snack/dessert.
You could totally make these into muffins if you prefer them portioned out that way … but I personally made it into a Bundt pan because it was faster and it looks pretty.
Serves 12. 4 Points Plus Values.
Ingredients:
  • Betty Crocker Spice Cake Mix
  • 15 oz canned pumpkin
  • 3 tbsp egg whites
  • ¼ cup water
  • 1 tsp baking soda
  • 26 gm, Nestle Toll House Peanut Butter & Milk Chocolate Chips
Preheat oven per box directions.
In a medium bowl mix together spice cake mix, canned pumpkin, egg whites, baking soda and water. Blend until smooth. Gently fold in the chocolate chips.
Spray a bundt pan or muffin tin with non-stick cooking spray, spoon cake batter into the mild.
Gently tap cake against a flat surface to eliminate any air bubbles.
Bake in an oven per box directions. Cake is done when a toothpick can be inserted into the center and comes out clean.

WhoNu? Chocolate Cookies

I’ve tried WhoNu? Cookies in the past, but one day I was on an Oreo cookie hunt and decided to pick up the WhoNu? Chocolate Cookies.
The cookies themselves are reminiscent of Oreos but they’re not 100%. These cookies are enriched in calcium (supposedly as much calcium and vitamin D as an 8 oz glass of milk), fiber (supposedly as much as a bowl of oatmeal), vitamin D & C (and as much vitamin C as a cup of blueberries).  These are made with no hydrogenated oils, no high fructose corn syrup and have 0 trans fat. They are a “healthier” alternative to Oreos, even though the nutritional stats are pretty similar across the board.  I truthfully only purchased these because I wanted an extra cookie. I mean these taste fine but they have a “healthier for you” flavor to them. It’s not the flavor associated with reduced fat foods, it’s truthfully hard to pinpoint what the flavor is – but it’s noticeable. They are chocolatey and sweet – which I feel is what you go for when you’re wanting a cookie. I do enjoy them and I find with these I can have my serving and call it a day.
A serving (3 cookies) is 150 calories or 4 points plus values.
QUESTION:
Have you tried WhoNu? cookies?

Bakers’ Corner Pumpkin Bread


I will truly try anything pumpkin as long as the nutrition information is worth it to me (and trust me, there are pumpkin items that just are not worth it to me).  One of the items that was worth it was this Bakers’ Corner Quick Bread & Muffin Mix – Pumpkin.  I had picked this box mix up at my local Aldi store and stuck it into the cabinet. Yesterday, I was in the mood to bake something since we didn’t have any baked goods in the house.
Deciding to skip the eggs and oil the boxed mix called for I opted to experiment with a handy dandy can of Diet Fresca. Diet soda works wonders in cake mix, so I thought why wouldn’t it work wonders in a pumpkin bread mix?  I added in almost the whole can of soda (minus, what would probably be 2 sips) and stirred it all up.  I added the contents to a Pam sprayed loaf pan and baked it off for 50 minutes.
The cake came out perfect. Moist and delicious – although I will say this is more spiced pumpkin than regular pumpkin.  You can definitely taste the spiciness in it because it’s right up there in the forefront. It’s not as spicy as other pumpkin desserts can be (such as spiced pumpkin pie) but it’s definitely noticeable.
Since I made the bread with soda, a slice (1/12th) was only 130 calories or 3 points plus values.
QUESTION:
Do you like experimenting with baking?

Beef and Bean Chili

The moment the weather switched to cooler temperatures instead of the warmer summer weather we’d been having – I was struck with a chili mood.  I know you can really eat chili any time of the year, but I personally usually only enjoy it during the fall and winter months because it’s warm, homey and comforting.
I make a homemade chili because homemade chilis are just the best in my opinion. I know there are shortcut routes like packets of seasoning, but I personally am not a huge fan of those because you can’t control the flavor (or heat).  Depending on my mood I increase the amount of chili and cumin in my dish – but this is typically my go-to “safe” chili to make when having dinner guests over. This is a larger recipe, but when I make chili I make a large pot to have to serve, for lunches and to freeze. It’s a hit, a crowd pleaser and it’s very filling.  The dish is versatile and great as leftovers (to store in the refrigerator or to stick in the freezer) and it can easily be transformed into chili mac.
You could also double your serving to 2 cups and increase the points plus value for a 2 cup serving to 8 points plus values.
Serves 17. 1 cup serving. 4 Points Plus Values.
Ingredients:
          1 2/3 lb 93% lean ground beef
          1 large onion, chopped
          2 medium bell peppers (1 red, 1 green), chopped
          2 tbsp minced garlic
          29 oz. Red Kidney Beans (do not drain)
          29 oz. Pink Beans (do not drain)
          14 oz. tomato sauce
          28 oz. canned diced tomatoes
          2/3 cup water (optional)
          1 tsp black pepper
          1 tsp salt
          1 tsp garlic powder
          1 ½ tsp oregano
          3 tsp cumin
          3 tbsp chili powder
Place a large non-stick pot (soup/stock pot) over medium high heat.  Spray the bottom of the pan with non-stick cooking spray, add in ground beef and break up with a spoon. Season meat with black pepper and salt. As the meat begins to cook, add in onion and minced garlic.  Cook until the onions start to sweat down and begin to change color (slightly translucent), then add in the green peppers. Cook until the meat is browned and no longer pink.
Add in can of sauce, diced tomatoes, kidney beans (with brine) and pink beans (with brine). Stir to combine.  Sprinkle in seasonings – chili powder, cumin, oregano, garlic powder – stir to combine.
Depending on the consistency of your chili you can now add in the 2/3 cup water, or you can even reduce it to 1/3 cup.
Lower your heat to medium low, cover and let simmer for 30-60 minutes.  Feel free to adjust your flavors at this point – if you like a spicier chili, add more cumin and chili powder.

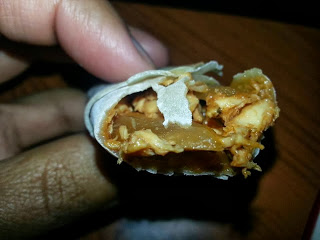
BBQ Chicken Rolls

I picked up the stuff to make pizza logs, but when it came time to make them I realized I forgot the pizza sauce and I did not have any in the cabinets. Since I didn’t want to open a big jar of pasta sauce, I decided to use my eggroll wrappers in a test recipe.  Since I had some leftover chicken in the refrigerator, I got a great idea for BBQ chicken rolls. BBQ chicken is a typically safe bet food wise (at least with my family) because buffalo chicken can be questionable for certain tastebuds.
These took about 5 minutes to prep everything, maybe 5-10 minutes to roll everything and 10-15 minutes to bake them.  Quite an easy meal to throw together, even on a whim!  They were delicious and a great meal. My boyfriend enjoyed them so much he kept going back for more. Winner!
Serves 15. 3 Points Plus Values.
Ingredients:
          15 NaSoya Egg Roll Wrappers
          1 medium onion, sliced
          10 oz. cooked roasted chicken, shredded
          8 tbsp Stubb’s BBQ sauce
Add sliced onion to a non-stick skillet and cook until tender. If onions begin to brown a little too much, add 2 tablespoons of water to let the onions steam a bit..  Add in chicken and combine with onions, then stir in bbq sauce so all chicken is evenly coated.
Spray a non-stick cooking sheet with non-stick spray.
Add a heaping tablespoon of chicken mixture to the center of an egg roll wrapper. Fold first corner in, fold eggroll over once (forward motion), fold in each side and roll forward. When triangle piece of wrapper is remaining, dampen the ends of your fingertips with water, smooth over the egg roll wrapper and seal shut. Place triangle side down on a baking sheet.  Spray the top of the rolls with non-stick cooking spray.
Bake in a 425 degree oven for 10-15 minutes. Turning halfway through to brown each side.

Pumpkin Oatmeal

With fall upon us I had a strong inkling for pumpkin oatmeal. With that, I decided to whip up a pot of pumpkin oatmeal to have on hand for the week.  I have seen pumpkin oatmeal recipes for the crock pot but they involved chunks of real pumpkin in it.  Since canned pumpkin is readily available to me I decided to venture down a different path.  I did google pumpkin oatmeal and I found a recipe by Aarti Sequeira from the Food Network. I used that as a stepping stone for my oatmeal and adapted it to the flavors I would like in my oatmeal as well as keeping an eye on the ingredients I used because I didn’t want my oatmeal to be astronomically high in points plus values.
I have to say the end result is pretty delicious. Its pumpkin flavored, but mildly sweet and I can have a variety of different serving sizes depending on my hunger at the time (1 1/4 cups = 6 points plus, 1 cup = 5 points plus or 1/2 cup = 2 points plus).  The thing I like about the dish is that it can be adapted to how you like your oatmeal – whether you like it wetter or dryer, you can increase or decrease on the additional water I added at the end.    The whole recipe made 5 cups of oatmeal.
Serves 5. Serving Size – 1 Cup.  5 Points Plus Values.
Ingredients:
          14 oz pumpkin puree
          2/3 cup skim milk
          1/3 cup unsweetened almond milk
          1 cup water, plus 2/3 cup reserved
          1 tsp pumpkin spice
          1 tsp cinnamon
          1 tsp brown sugar
          ¼ cup sugar free maple syrup
          ¼ tsp salt
          1 ¼ tbsp honey
          3 packets Equal (optional)
          2 cups quick cooking oats
In a large pot add pumpkin, milk, almond milk, brown sugar, 1 cup water, cinnamon, maple syrup, salt, cinnamon and pumpkin pie spice.  Turn flame on to medium heat and blend pumpkin together with the remaining contents until blended smooth and starting to bubble.
Once bubbling add in the quick cooking oats and stir to combine. When combined drizzle in the honey and stir to combine.  Depending on the thickness, slowly add in some of the reserved 2/3 cup water and blend water into the oatmeal until absorbed.
Taste the flavor of the oatmeal and if not sweet enough for your liking, sprinkle in 3 packets of Equal and stir to combine.  Allow the pot to simmer for 1-2 minutes before turning off the heat.

Dinner: Baked Eggplant Cutlets w/ Meat sauce & Carba-Nada

This was one of the delicious dinners I pulled together using the baked eggplant cutlets (see here) and the meat sauce (see here) I had made.  I wanted to enjoy the taste of the fresh eggplant without loading it up with a bunch of sauce and cheese.  I planned on making eggplant parmesan with some of the leftovers – but with it fresh out of the oven, simplicity was the best route.
I cooked up a 1 ½ cup serving of Carba-nada pasta and tossed it with ¼ cup meat sauce when done.  I then served that with my 3 slices of baked eggplant cutlets and topped it with ¼ cup meat sauce.  It was a perfect combination and a delicious meal. Filling, yet light.
The entire plate shown was only 8 points plus values!  Not bad for a take at a classic Italian meal at home.

Nachos! Using Trader Joe’s Organic Reduced Guilt Tortilla Chips & Queso Cheese Dip

<!–[if !mso]>st1\:*{behavior:url(#ieooui) } <![endif]–>

I had wanted nachos for a few days, I decided I was going to have them – so I threw them on my tracker earlier in the day. When I wanted them, I went into the kitchen and assembled them.  They were a delicious snack, low in points, loaded with fresh vegetables and completely satisfying.
 
A few Trader Joe’s trips ago I had picked up a bag of the Trader Joe’s Organic Reduced Guilt White Corn Tortilla Chips because I wanted to try them. They looked crispy in the bag and according to the nutrition facts, roughly 14 chips was a serving size.  A serving was also only 3 points plus.  I measured out 1 ¼ servings (which is 4 points plus) on my scale and arranged the chips on my plate.
I took the remaining Trader Joe’s Queso Cheese Dip and put the jar straight into the microwave (my jar was just about empty, I wouldn’t suggest doing this if your jar is full and you’re going to put it back in the fridge).  When it was nice and hot I took it out, stirred it up and drizzled 2 tablespoons over my chips. The great thing about this queso is it’s 0 points plus for 2 tablespoons!  The cheese itself is quite yummy, it’s a bit tangy and slightly sour, but when mixed with sour cream and fresh veggies you don’t notice the tanginess much more.  You can see me initial post on the queso here.
I then topped off the queso covered chips with diced red onion, diced tomato and diced green peppers. Finishing it up I added in 3 heaping tablespoons of mild salsa and a teaspoon of sour cream right in the middle. Deliciousness!
The greatest part is the entire plate shown is only 4 points plus values!  Take that Taco Bell!
QUESTION:
Do you like making nachos at home?